


If you have ever noticed one room in your house stays freezing in winter while another feels sweltering in summer, or your energy bills keep climbing despite reasonable thermostat settings, the culprit is almost certainly your walls. Most homeowners do not think about what sits behind their drywall, but uninsulated or poorly insulated walls are one of the largest sources of energy waste in a home. In fact, according to the U.S. Energy Information Administration (EIA), space heating and cooling account for roughly 52% of a household’s total annual energy consumption. That means more than half of every dollar you spend on energy could be affected by how well your walls hold back the outside temperature.
Wall insulation is the material installed within your wall cavities or on wall surfaces to slow down the transfer of heat between the interior and exterior of your home. When done right, it keeps warm air inside during winter and blocks heat from entering during summer. It is one of the most practical, effective home improvements you can make, and it pays dividends for decades.
After years of installing insulation in homes across North Carolina, we have seen firsthand the dramatic difference proper wall insulation makes. A home that drafts and rattles in January can become quiet and comfortable. Utility bills that seemed stuck on a permanent upward trend can drop noticeably. This guide is built on that field experience, combined with building science principles and the latest industry standards.
Here is what this guide covers:
- The basics of heat transfer and why wall insulation stops it
- Every major insulation type, including fiberglass, cellulose, mineral wool, rigid foam boards, and spray foam, with honest pros and cons
- How R-value works and what levels you actually need
- Step-by-step installation guidance for new construction and retrofits
- Common mistakes that reduce insulation performance, and how to avoid them
- A comparison table so you can quickly identify the best option for your situation
- Answers to the most frequently asked questions homeowners ask us
What Is Wall Insulation and Why Does It Matter?
Wall insulation is any material placed inside or on the surface of a wall assembly to reduce the rate of heat flow. Most wall insulation works by trapping millions of tiny air pockets within its structure. Since still air is a remarkably poor conductor of heat, these pockets slow heat transfer from one side of the wall to the other. The result is a more stable, comfortable indoor temperature and lower energy bills.
According to data compiled on Wikipedia’s building insulation reference, roughly 40% of global energy consumption is tied to buildings, and the majority of that goes toward heating and cooling. Sufficient thermal insulation is described as a fundamental requirement for a healthy indoor environment, one that prevents moisture buildup, mold growth, and structural damage. That is not just a comfort issue. It is a building durability issue.
In the United States, the ASHRAE 90.1 standard sets prescriptive minimum R-values for wall insulation based on climate zone. These requirements are the baseline, not the ideal. Many building science professionals recommend exceeding code minimums, especially in mixed-humid climates like the Southeast, where summers are hot and humid and winters can still bring freezing temperatures.
Wall insulation matters for several concrete reasons:
- Energy efficiency: Properly insulated walls reduce the workload on your HVAC system, which means less energy consumed month after month.
- Thermal comfort: You eliminate cold spots near exterior walls, reduce drafts, and maintain even temperatures from room to room.
- Moisture control: When combined with proper air sealing and vapor barriers, insulation helps keep wall cavities dry, preventing mold and rot.
- Sound dampening: Many insulation types also reduce airborne noise transmission through walls.
- Environmental impact: Using less energy for heating and cooling directly reduces greenhouse gas emissions associated with power generation.
How Heat Moves Through Walls
Before choosing an insulation type, it helps to understand the three ways heat travels through your walls. All insulation types resist these mechanisms to varying degrees.
Conduction is the direct transfer of heat through a solid material. Touch a metal spoon sitting in a hot pot, and you feel conduction at work. In a wall, heat conducts through studs, drywall, sheathing, and siding. Insulation placed in the cavities between studs interrupts conductive heat flow because the insulation material itself has very low thermal conductivity.
Convection is heat transfer through moving air or fluid. In a wall cavity without insulation, warm air rises along the interior surface, cools at the top, and sinks along the exterior surface, creating a circulating loop that carries heat through the wall. Insulation fills these cavities with millions of small air pockets, preventing that convective loop from forming.
Radiation is the transfer of heat through electromagnetic waves, the same way the sun warms your skin. Radiant heat can pass through wall assemblies, particularly through windows and uninsulated framing. Some insulation types, especially those with reflective foil facers, are designed specifically to reduce radiant heat transfer.
A well-insulated wall addresses all three. Bulk insulations like fiberglass and cellulose primarily slow conduction and convection. Reflective barriers and foil-faced rigid foams additionally reduce radiation. Spray foam takes things a step further by sealing gaps and cracks, which also eliminates convective air leakage.
Understanding R-Value: The Standard for Measuring Insulation
R-value is the most commonly used metric for rating insulation in the United States. It measures thermal resistance, which is how well a material resists the flow of heat. Higher R-values mean better insulating performance. The R-value of building insulation materials is expressed in units of degree Fahrenheit square-feet hours per British thermal unit (F-ft2-h/BTU).
One of the practical features of R-value is that it is generally additive. If you layer two materials, the combined R-value equals the sum of the individual layers. So an R-13 fiberglass batt paired with an R-5 rigid foam board on the exterior gives you a total R-18 assembly. This makes it straightforward to calculate whether a wall assembly meets your target.
Different insulation materials deliver different R-values per inch of thickness:
- Polyurethane spray foam (closed-cell): R-5.5 to R-6.5 per inch
- Polyisocyanurate rigid board: R-5.5 to R-6.8 per inch
- Extruded polystyrene (XPS): R-5.0 per inch
- Expanded polystyrene (EPS): R-3.6 to R-4.2 per inch
- High-density fiberglass batts: R-3.6 to R-5.0 per inch
- Standard fiberglass batts: R-3.1 to R-4.3 per inch
- Mineral wool batts: R-3.0 to R-3.85 per inch
- Cellulose (loose-fill or dense-pack): R-3.0 to R-3.8 per inch
- Open-cell spray foam: R-3.6 to R-3.7 per inch
Expert Tip: Do not get fixated on R-value per inch alone. The overall wall assembly matters just as much. A 2×4 stud wall with R-15 cavity insulation actually performs closer to R-12 whole-wall because the wood studs (at roughly R-1 per inch) create thermal bridges that bypass the insulation. Adding a continuous layer of rigid foam insulation on the exterior of the sheathing interrupts those thermal bridges and dramatically improves real-world performance.
Key Takeaways: R-Value
- R-value measures thermal resistance. Higher numbers mean better insulation.
- R-values are additive across layers, making it easy to calculate total performance.
- R-value per inch varies significantly between materials. Closed-cell spray foam and polyisocyanurate boards offer the highest per-inch ratings.
- Whole-wall R-value is always lower than cavity R-value due to thermal bridging through framing.
Types of Wall Insulation: A Detailed Comparison
There is no single “best” insulation for every wall. The right choice depends on your climate zone, whether you are building new or retrofitting, your budget, and your performance priorities. Here is a thorough look at each major type.
Fiberglass Batts and Rolls
Fiberglass insulation is the most widely used wall insulation in the United States. It comes in pre-cut batts designed to fit standard 2×4 (R-13) and 2×6 (R-19 or R-21) wall cavities, as well as longer rolls. It is made from spun glass fibers bound together with a resin binder.
Pros:
- Widely available at any home improvement store
- Relatively affordable
- Non-combustible and will not melt
- Easy to install in new construction open wall cavities
- Face-backed varieties include a vapor retarder and friction fit
Cons:
- Loses effectiveness if compressed, packed too loosely, or installed with gaps
- Does not seal air leaks on its own
- Can be itchy and irritating to handle without protective equipment
- Moisture can significantly reduce its insulating properties
- Prone to settling over time in some applications
Fiberglass works best in new construction where wall cavities are open, clean, and dry, and the installer can ensure a snug friction fit without compression.
Cellulose Insulation
Cellulose insulation is made primarily from recycled newsprint treated with borate fire retardants. It is installed as loose-fill blown into wall cavities through holes drilled in the drywall or exterior sheathing, or as a damp-spray applied during new construction.
Pros:
- Made from approximately 80% recycled content
- Excellent fire resistance due to borate treatment
- Fills gaps and voids around wires, pipes, and electrical boxes better than batts
- Good sound-dampening qualities
- Slightly higher R-value per inch than standard fiberglass
Cons:
- Can settle over time if not densely packed, reducing effective R-value
- Heavier than fiberglass, which requires careful installation in wall cavities
- Can absorb and hold moisture if exposed to water intrusion
- Not a vapor barrier or air seal on its own
- Requires specialized blowing equipment for installation
Cellulose is a strong option for retrofitting existing walls, especially when dense-packed into cavities at higher densities to prevent settling.
Mineral Wool (Rock Wool or Slag Wool)
Mineral wool insulation is manufactured from basalt rock or steel slag melted and spun into fibers. It is available as batts, rolls, and loose-fill.
Pros:
- Naturally fire-resistant to over 2,000 degrees Fahrenheit without additional chemical treatment
- Extremely high sound-dampening performance
- Holds its shape over time without settling
- Moisture-resistant; it can get wet and still retain most of its R-value when dried
- Rigid enough to friction-fit securely in wall cavities
Cons:
- More expensive than fiberglass
- Heavier, which can make installation more demanding
- Less commonly stocked in retail stores than fiberglass
Mineral wool is an excellent choice for homeowners who prioritize fire resistance and acoustic performance alongside thermal insulation. It is also well-suited for walls adjacent to garages, mechanical rooms, or other fire-rated assemblies.
Rigid Foam Board Insulation
Rigid foam boards are dense panels made from expanded polystyrene (EPS), extruded polystyrene (XPS), or polyisocyanurate (polyiso). They are typically installed on the exterior of the wall sheathing (as continuous insulation) or on the interior side of the wall assembly.
Pros:
- Very high R-value per inch, allowing more insulation in thinner profiles
- Acts as continuous insulation, bridging across studs and eliminating thermal bridging
- Provides a built-in drainage plane when installed on the exterior
- Resists moisture absorption (especially XPS and polyiso)
- Foil-faced polyiso adds a radiant barrier
Cons:
- More expensive per square foot than fiberglass or cellulose
- Requires careful detailing around windows, doors, and penetrations
- Foam insulation is combustible and requires a thermal barrier (like drywall) on the interior side
- EPS is less moisture-resistant than XPS
Rigid foam board is the go-to choice for continuous insulation strategies in new construction and energy-efficient retrofits. Installing R-5 to R-10 of rigid foam on the exterior of a wall assembly is one of the most effective ways to improve real-world thermal performance.
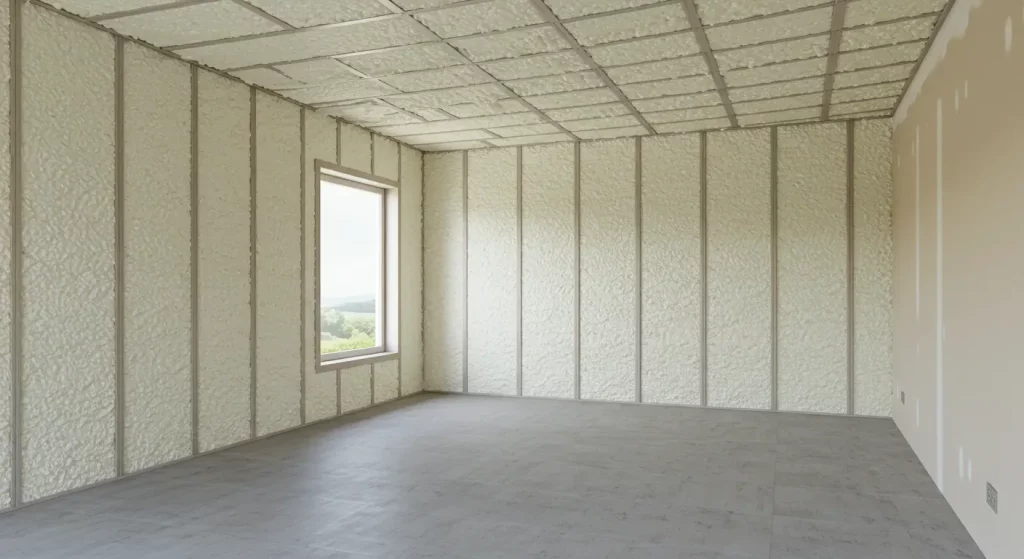
Spray Foam Insulation
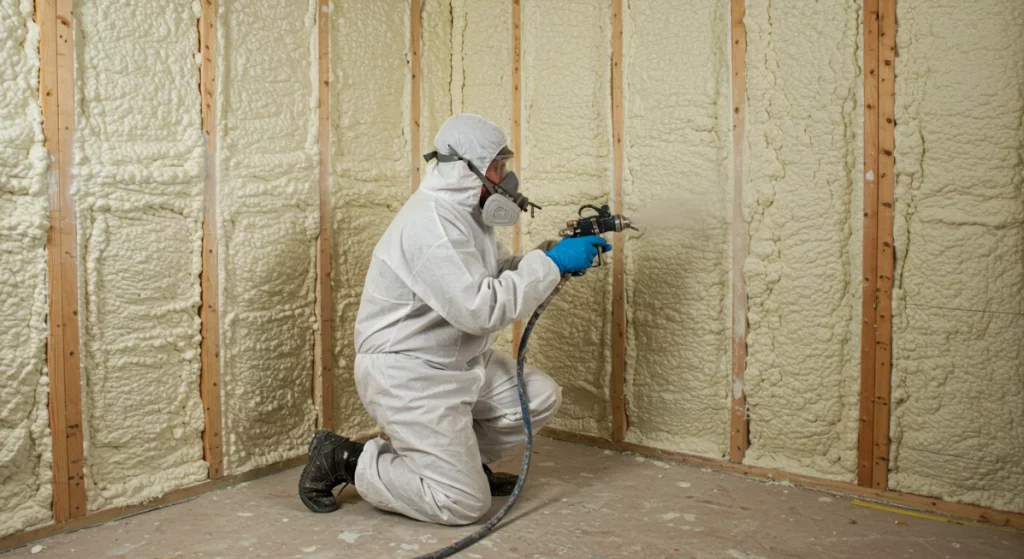
Spray foam insulation is applied as a liquid that expands and cures into a solid foam. It comes in two main categories: open-cell and closed-cell.
Open-cell spray foam has a lower density and expands dramatically (up to 100 times its liquid volume). It delivers roughly R-3.6 to R-3.7 per inch. It is flexible and good for sound control but does not provide a significant moisture barrier.
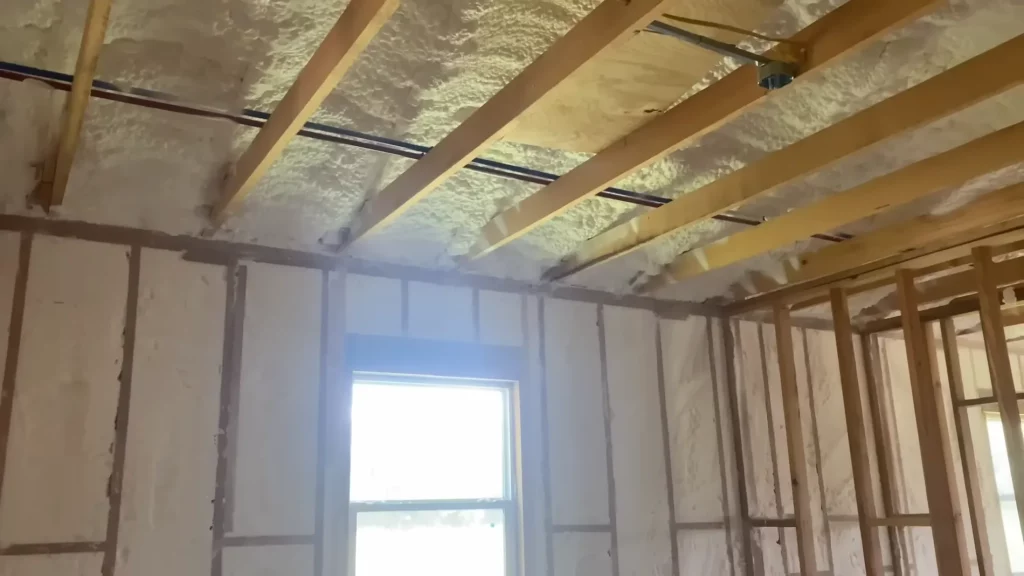
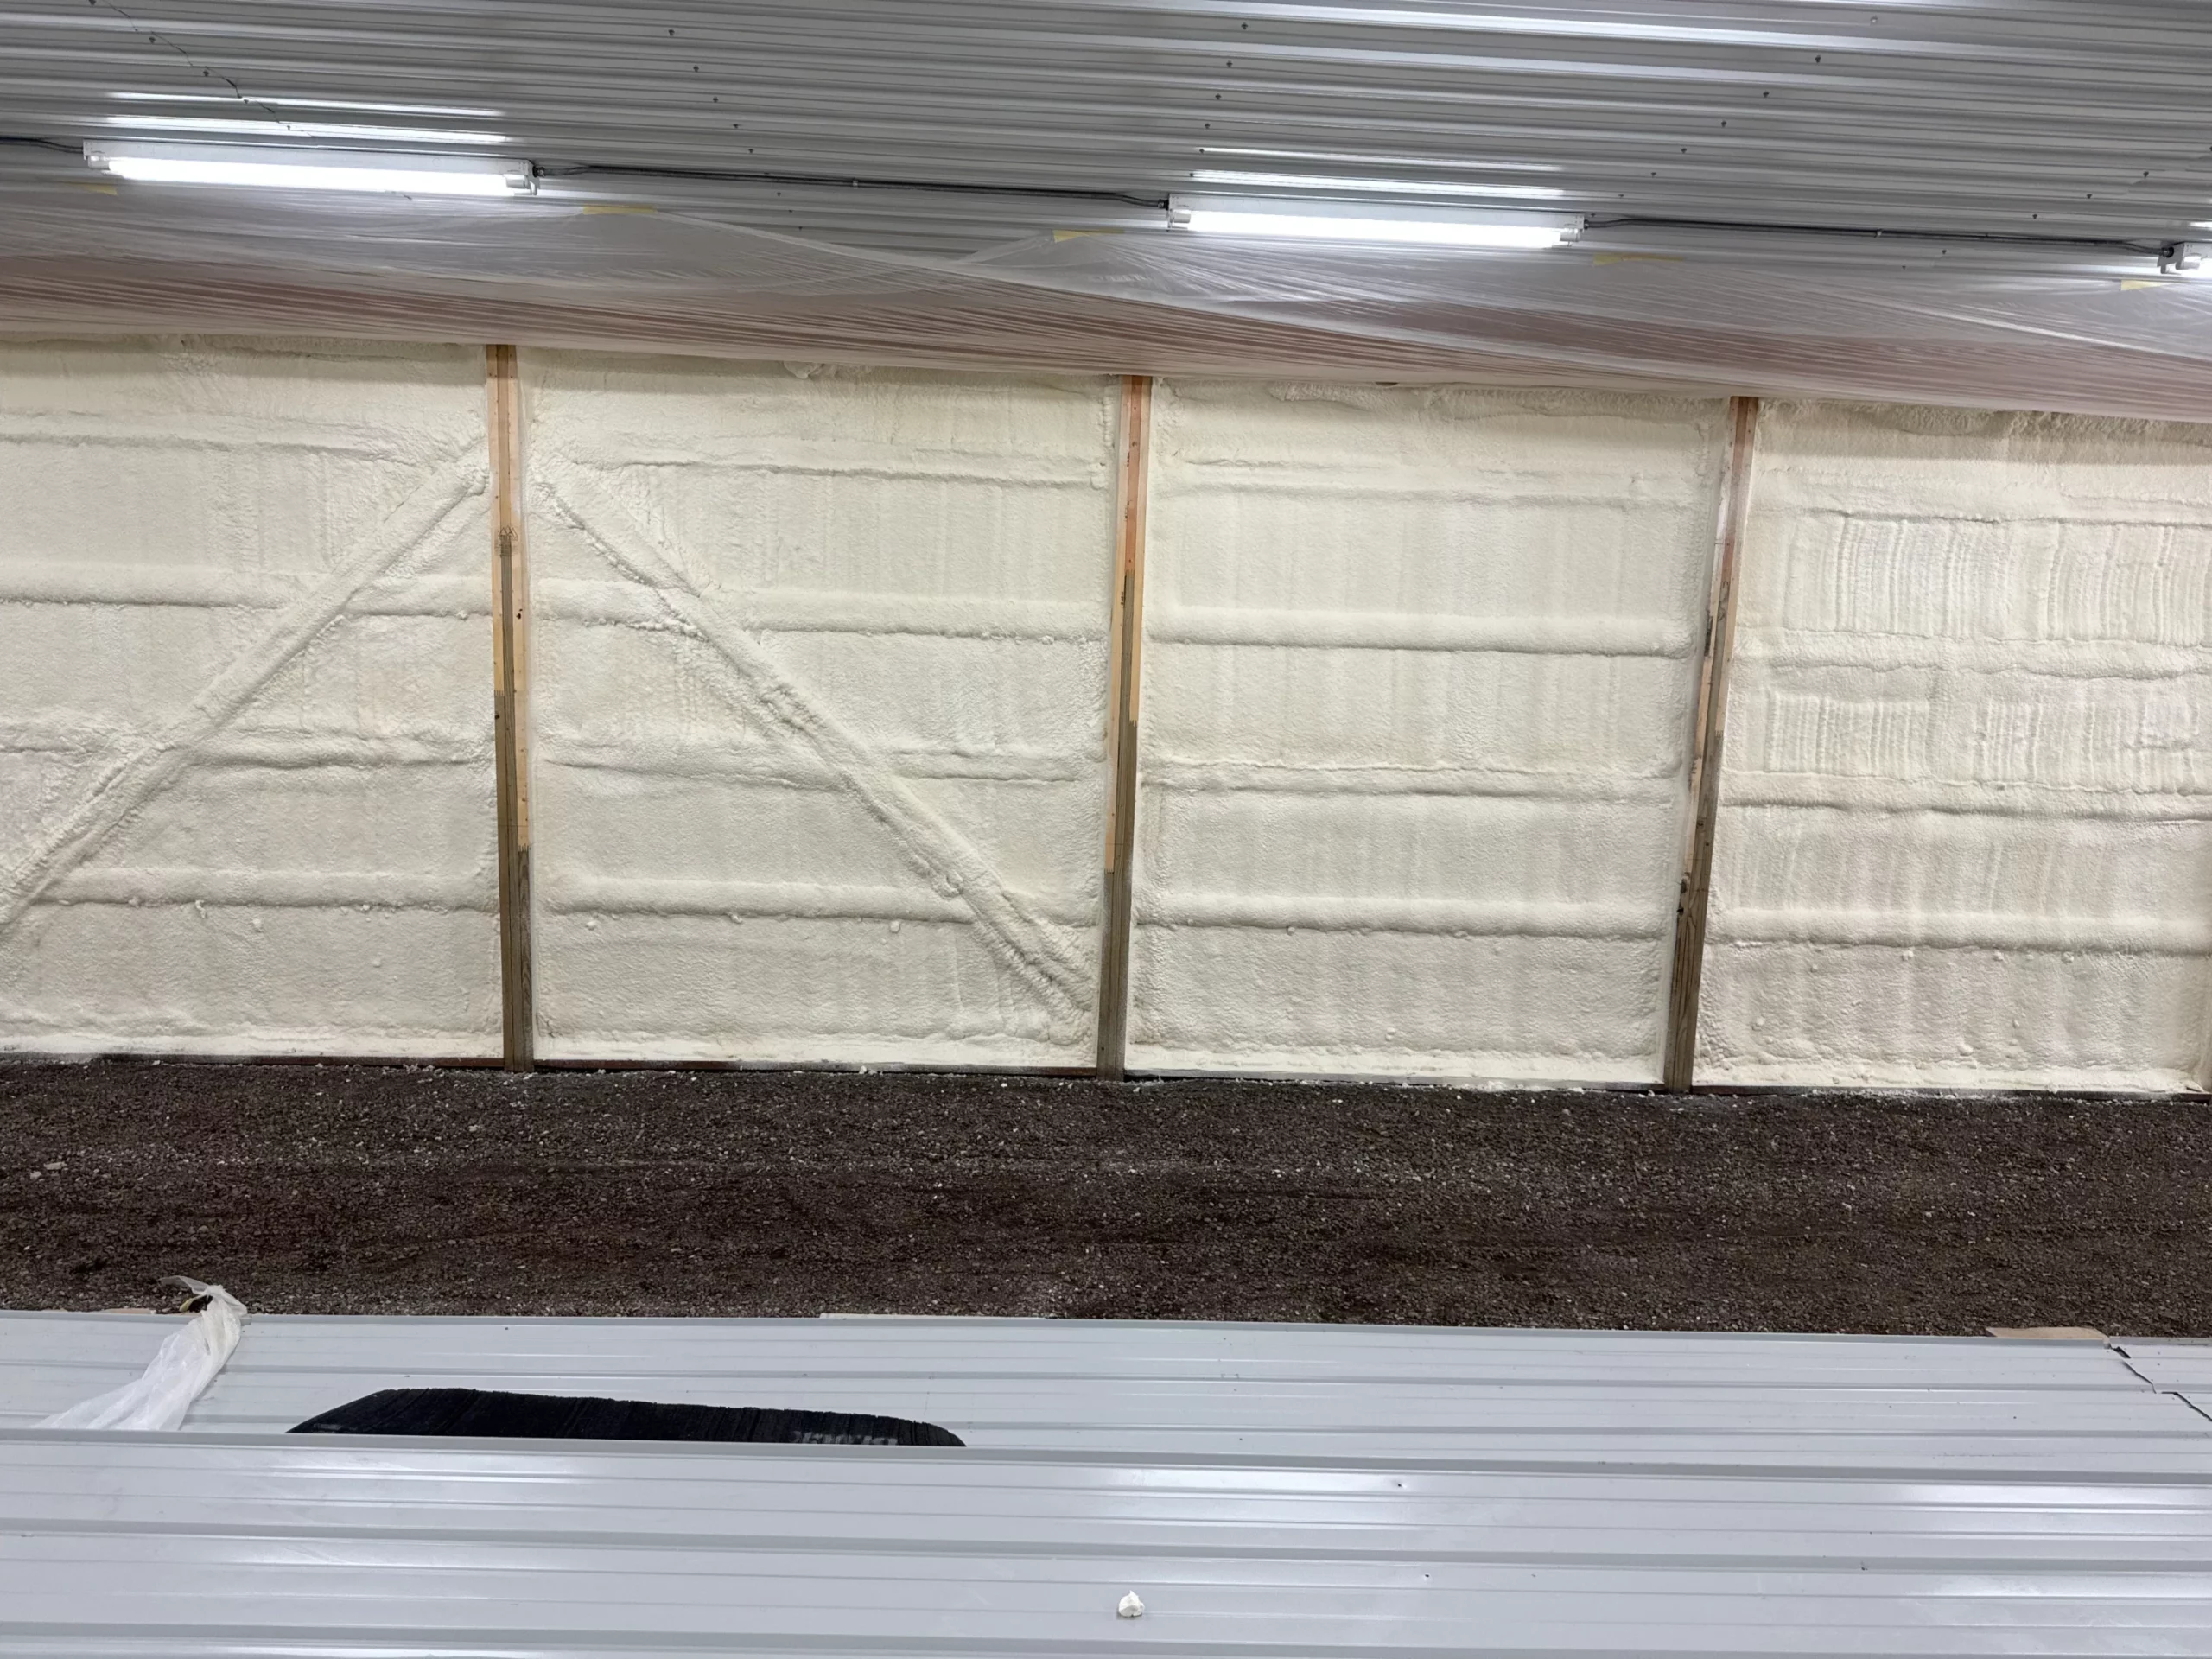
Closed-cell spray foam has a higher density, expands less, and delivers roughly R-5.5 to R-6.5 per inch. It forms a rigid, impermeable barrier that also functions as both a vapor retarder and an air barrier. It adds structural rigidity to the wall assembly.
Pros of spray foam (both types):
- Expands to fill every crack, gap, and void in the wall cavity
- Provides a superior air seal that no other insulation type can match
- Eliminates convective air movement within the cavity
- Adheres to framing and stays in place permanently
- Closed-cell foam adds structural strength to the wall
Cons:
- Highest per-square-foot cost among common insulation types
- Requires professional installation with specialized equipment
- Off-gassing during and immediately after installation requires ventilation
- Not a DIY-friendly material
- If incorrectly applied (improper mixing ratios or temperature conditions), the foam may not cure properly
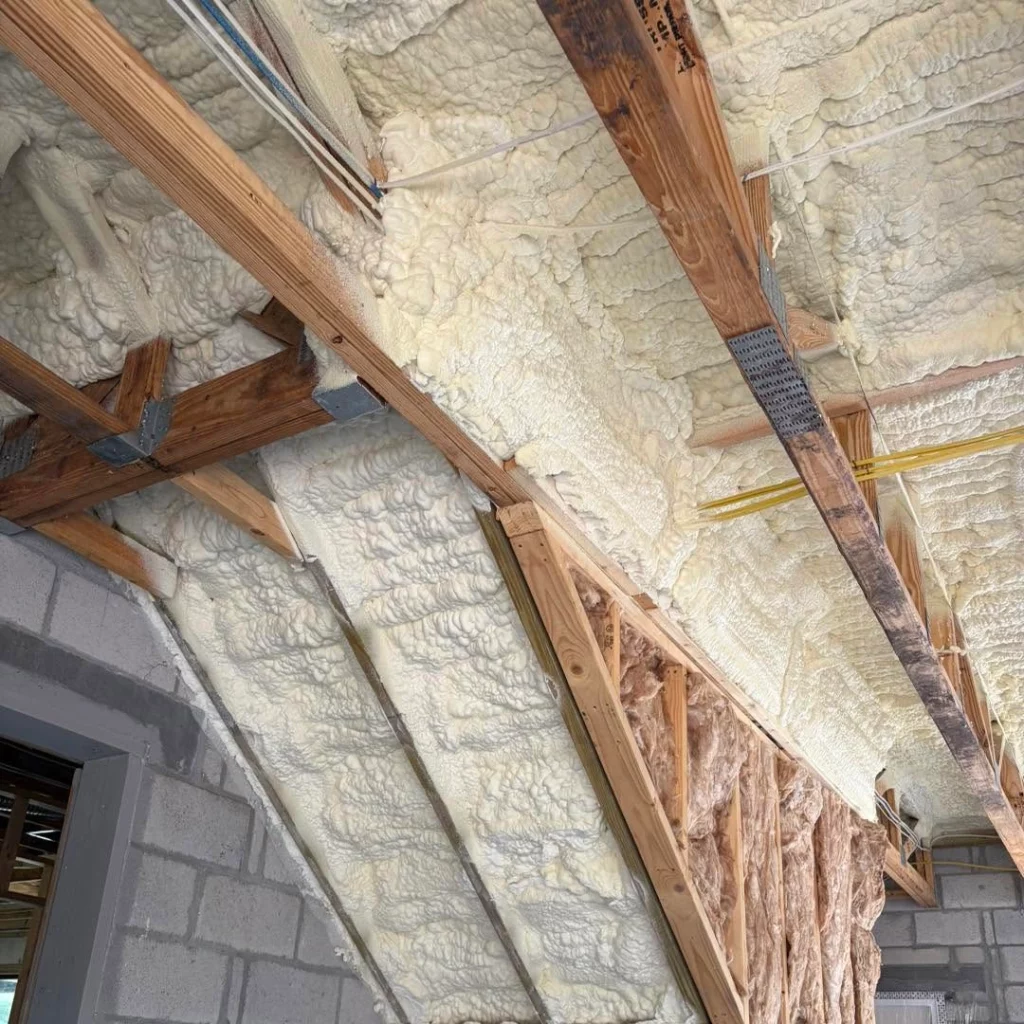
Spray foam insulation is particularly effective in existing homes where wall cavities are difficult to access. Our technicians frequently use spray foam in rim joist areas, around windows and doors, and in any wall cavity where air sealing is critical.
Structural Insulated Panels (SIPs) and Insulated Concrete Forms (ICFs)
For new construction, two advanced wall systems deserve mention. Structural Insulated Panels (SIPs) are factory-manufactured panels with a foam core sandwiched between two structural facings, typically oriented strand board. Insulated Concrete Forms (ICFs) are hollow blocks or panels made of foam insulation that are stacked and filled with concrete to form the wall structure.
Both systems deliver very high whole-wall R-values because they eliminate thermal bridging almost entirely. SIPs typically range from R-15 to R-40 depending on thickness, and ICFs typically deliver R-20 to R-26 for the foam core alone. These systems are more expensive upfront but can dramatically reduce the size and cost of the HVAC system needed.
Wall Insulation Comparison Table
The table below gives you a quick side-by-side reference of the most common wall insulation options.
| Insulation Type | R-Value Per Inch | Air Sealing | Fire Resistance | Best Application | DIY Friendly |
|---|---|---|---|---|---|
| Fiberglass Batts | 3.1 – 4.3 | Poor | Non-combustible | New construction, open cavities | Yes |
| Cellulose Loose-Fill | 3.0 – 3.8 | Moderate | Good (borate-treated) | Retrofit existing walls | No (equipment needed) |
| Mineral Wool Batts | 3.0 – 3.85 | Moderate | Excellent (2,000+ F) | Fire-rated walls, acoustic needs | Yes |
| EPS Rigid Board | 3.6 – 4.2 | N/A (continuous) | Requires thermal barrier | Exterior continuous insulation | Moderate |
| XPS Rigid Board | 5.0 | N/A (continuous) | Requires thermal barrier | Exterior continuous insulation | Moderate |
| Polyiso Rigid Board | 5.5 – 6.8 | N/A (continuous) | Requires thermal barrier | Exterior continuous insulation | Moderate |
| Open-Cell Spray Foam | 3.6 – 3.7 | Excellent | Needs thermal barrier | Interior walls, sound control | No |
| Closed-Cell Spray Foam | 5.5 – 6.5 | Excellent | Needs thermal barrier | All wall types, moisture control | No |
Key Takeaways: Choosing Wall Insulation
- There is no universal “best” insulation. Match the material to the application.
- For existing wall retrofits, dense-pack cellulose and spray foam are the most practical options.
- For new construction, combining cavity insulation with continuous rigid foam exterior insulation delivers the highest performance.
- If air sealing is a priority, spray foam is unmatched. If budget is the primary concern, fiberglass batts remain viable when properly installed.
The Benefits of Properly Insulated Walls
Lower Energy Bills
This is the benefit most homeowners think about first, and it is real. When your walls have adequate insulation, your heating system runs less in winter and your air conditioning runs less in summer. The EIA reports that average annual energy use per U.S. household has actually declined over the past three decades, and improvements in building insulation are cited as one of the primary reasons.
Improved Comfort
Insulated walls eliminate the cold, drafty feeling you get when sitting near an exterior wall in January. They also prevent the radiant heat gain you feel from sun-baked walls in July. The result is more even temperatures throughout every room.
Better Moisture Management
When insulation is paired with proper air sealing and vapor control, it keeps interior wall surfaces warm enough to prevent condensation. Condensation within wall cavities leads to mold, wood rot, and structural damage. Building researchers have noted that approximately 12-14% of building damage is caused by mold problems, most of which originate from condensation on poorly insulated surfaces.
Reduced Noise Transmission
If you have ever lived in a home where you could hear conversations from the next room through the walls, you know how thin standard drywall and an empty cavity can be. Adding insulation, particularly dense materials like cellulose and mineral wool, noticeably reduces airborne sound transmission.
Increased Home Value
Energy-efficient homes sell for more and spend less time on the market. Buyers increasingly expect proper insulation, and a well-insulated home is a tangible selling point, especially in markets with hot summers and cold winters.
Expert Tip: Before adding insulation to your walls, have a professional energy audit performed. An infrared camera can reveal exactly where your walls are under-insulated or where air leaks exist. This allows you to target your insulation investment where it will make the biggest difference.
How to Choose the Right Wall Insulation
Choosing insulation involves evaluating several factors simultaneously. Here is a straightforward approach.
Determine Your Climate Zone
The United States is divided into eight climate zones defined by the International Energy Conservation Code (IECC). Zone 4, which covers much of North Carolina, requires a minimum cavity R-value of R-13 for wood-framed walls, plus a continuous insulation layer of R-5 for residential buildings, per ASHRAE standards. Colder zones require higher values. You can find your zone on the IECC climate map.
Assess Your Wall Construction
- Standard 2×4 framing: Cavities are 3.5 inches deep, limiting cavity insulation to R-13 to R-15 maximum with fiberglass or mineral wool.
- 2×6 framing: Cavities are 5.5 inches deep, allowing R-19 to R-21.
- CMU or concrete walls: Cavity insulation does not apply. Use rigid foam board on the interior or exterior, or spray foam.
Decide Between New Construction and Retrofit
If you are building new or doing a major remodel with open walls, you have the full range of options available. If you are retrofitting an existing home with finished walls, your practical options narrow to blown-in cellulose, blown-in fiberglass, or spray foam injected through small holes in the drywall or exterior.
Consider Your Performance Priorities
- Maximum energy efficiency: Combine cavity insulation with continuous exterior rigid foam.
- Air sealing and moisture resistance: Closed-cell spray foam.
- Budget-conscious approach: Fiberglass batts in new construction, dense-pack cellulose in retrofits.
- Fire and acoustic performance: Mineral wool.
Wall Insulation Installation Guide
New Construction: Installing Fiberglass or Mineral Wool Batts
- Prepare the cavities: Remove any construction debris, staples, or protruding nails from the stud bays. The cavity should be clean and dry.
- Measure and cut: Measure each cavity width between studs at several points, as framing is rarely perfectly spaced. Cut batts about 1/2 inch wider than the cavity for a snug friction fit. Use a straight edge and sharp utility knife.
- Install around obstacles: Split batts around electrical wires and plumbing rather than stuffing them behind or in front of these obstacles. Notch batts around electrical boxes and carefully fit them behind the box so the box is not buried in insulation.
- Friction fit, do not compress: The batt should stay in place without fasteners in standard 16-inch or 24-inch on-center framing. If you have to force it in, it is too wide. Compressed insulation loses R-value.
- Vapor retarder: If using faced batts, the paper or plastic facing should face the warm side of the wall (the interior in heating-dominated climates). In mixed climates, check local code requirements.
- Inspect: After installation, visually check every cavity. There should be no gaps, voids, or compressed areas. Pay special attention to corners, around windows, and above and below headers.
Expert Tip: One of the most common installation errors we see is missing the band joist and rim joist areas at the floor framing perimeter. These areas are major sources of air leakage and heat loss. Insulating and air-sealing them with spray foam or rigid foam can make a surprising difference in comfort and energy use.
Retrofitting Existing Walls with Blown-In Insulation
For homes with finished walls, blown-in cellulose or fiberglass is the most practical wall insulation upgrade. The general process works as follows:
- Drill access holes: Holes (typically 2 to 2.5 inches) are drilled through the exterior sheathing at the top of each stud bay, or through the interior drywall at the bottom of each cavity. Exterior access is preferred because it avoids patching painted interior walls.
- Fill the cavity: A specialized blowing machine injects insulation into each cavity under pressure. For cellulose, dense-packing at 3.5 pounds per cubic foot is the standard for wall cavities. This density prevents settling and provides some air sealing.
- Monitor fill level: Installers monitor the fill by feeling the wall surface or using fill indicators. Each cavity should be completely filled with no gaps.
- Seal the holes: The access holes are plugged and sealed. On exterior siding, the siding is reinstalled over the holes. On interior drywall, holes are patched and sanded.
- Post-installation inspection: A quality installer will use an infrared camera to verify complete fill and identify any missed cavities before leaving.
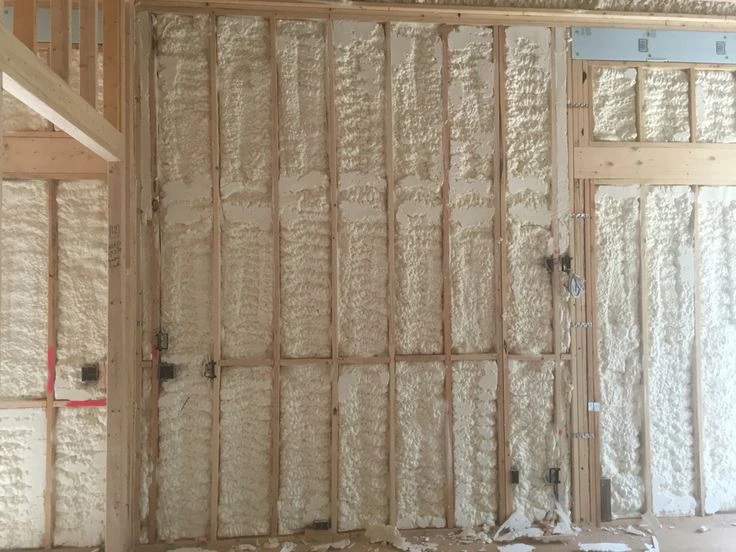
Installing Spray Foam in Wall Cavities
Spray foam installation requires professional equipment and training. The process involves spraying the liquid foam mixture into wall cavities where it expands and cures. For closed-cell foam, the installer sprays in lifts (typically 1 to 2 inches per pass) to avoid excessive heat generation from the curing reaction. The foam adheres to studs, sheathing, and any obstacles within the cavity, filling gaps that batts cannot reach.
Common Wall Insulation Mistakes and How to Avoid Them
After inspecting hundreds of homes, we have identified recurring mistakes that reduce insulation performance. Avoiding these will help you get the full benefit of your investment.
Leaving gaps and voids: Even a small gap next to a stud or around an electrical box creates a path for air movement that can bypass a large area of insulation. The R-value of insulation applies only to properly installed material. A 2% gap in coverage area can reduce effective insulation performance by much more than 2% because air flows preferentially through the path of least resistance.
Compressing insulation: Stuffing R-19 batts into a 2×4 cavity designed for R-13 does not give you R-19. The compression forces the glass fibers closer together, increasing their density and conductivity. You actually end up with less R-value than a properly fitted R-13 batt.
Ignoring air sealing: Insulation is not an air barrier. Fiberglass, cellulose, and mineral wool all allow air to pass through them. If your wall has air leaks, those leaks will carry heat in and out regardless of how much insulation is in the cavity. Always pair insulation with air sealing at the same time.
Skipping vapor control: In humid climates, getting the vapor retarder placement wrong can trap moisture inside the wall cavity. This leads to mold growth, wood rot, and degraded insulation. Consult local building codes and a building science professional for vapor control guidance specific to your climate.
Not insulating band joists and rim joists: The area where your floor framing meets the exterior wall (the band or rim joist) is often left uninsulated. This perimeter accounts for a disproportionate amount of heat loss because it is an unbroken band of wood framing with no cavities to insulate. Spray foam or rigid foam board are the best solutions here.
Expert Tip: If you are planning to insulate existing walls and your home was built before 1980, be aware that some older homes may contain vermiculite insulation that could include asbestos. Have the material tested by a certified lab before disturbing it. If asbestos is present, professional abatement is required before any insulation work begins.
What About Vapor Barriers and Wall Assemblies?
Insulation does not work in isolation. The performance of your wall assembly depends on how the insulation interacts with air barriers, vapor retarders, and weather-resistive barriers. Getting these layers in the right order matters.
In a typical wall assembly from exterior to interior, you have: exterior cladding, weather-resistive barrier (house wrap), sheathing, continuous insulation (if used), framing with cavity insulation, and finally drywall with a vapor retarder if needed.
The general principle is that walls should be able to dry in at least one direction. If moisture gets into the wall cavity from either side, there should be a path for it to escape. This is why many modern wall assemblies use “smart” vapor retarders that vary their permeability based on humidity conditions, rather than traditional polyethylene sheets that can trap moisture.
In mixed-humid climates like North Carolina, vapor control strategies are more complex than in purely heating-dominated or cooling-dominated climates. The wall may need to dry to the interior in summer and to the exterior in winter. Consulting with an insulation professional who understands building science is strongly recommended.
Putting Your Wall Insulation Strategy into Action
Wall insulation is not a project you think about every day, but it is one of the most impactful investments you can make in your home. It reduces your energy bills, makes your living spaces more comfortable, protects your wall assemblies from moisture damage, and reduces your carbon footprint. The right insulation type, properly installed, will deliver these benefits for decades.
Start by identifying where your current insulation falls short. An energy audit can pinpoint specific weak areas. Then match the insulation type to your situation, whether that is fiberglass batts in a new addition, dense-pack cellulose in existing walls, spray foam for air-sealing critical areas, or rigid foam for continuous exterior insulation. Prioritize proper installation over the highest R-value, because even the best insulation underperforms when poorly installed.
Bookmark this guide and return to it as you plan your project. Every wall in your home presents an opportunity to improve comfort and efficiency.
Need Expert Guidance?
If you are ready to improve your home’s wall insulation and want professional guidance on the best approach for your specific situation, our team at Raleigh Excel Spray Foam Insulation is here to help. We offer comprehensive insulation assessments and professional installation for homes throughout the Raleigh area.
Reach out to us at [email protected] or call us at (919) 301-9435 to schedule a consultation. We will assess your walls, recommend the right insulation solution, and make sure it is installed correctly so you get the full performance and energy savings you deserve.
Frequently Asked Questions About Wall Insulation
How do I know if my walls need more insulation?
Look for telltale signs: high energy bills, uneven temperatures between rooms, cold or hot spots near exterior walls, and drafts. A professional energy audit with a blower door test and infrared camera will give you a definitive answer.
Can I add insulation to existing walls without removing the drywall?
Yes. Blown-in cellulose or fiberglass can be installed through small holes drilled in the exterior siding or interior drywall. Spray foam can also be injected into wall cavities through access holes. All methods require patching after installation.
Does wall insulation help with soundproofing?
Yes. Dense-pack cellulose and mineral wool are particularly effective at reducing airborne sound transmission through walls. Fiberglass and spray foam also provide some sound reduction, though to a lesser degree.
How long does wall insulation last?
Most wall insulation materials last the life of the building when properly installed and kept dry. Fiberglass and mineral wool do not degrade. Cellulose can settle slightly over decades but dense-packing minimizes this. Closed-cell spray foam may see a modest R-value reduction over 20 to 30 years as blowing gases slowly diffuse out.
Is spray foam worth the extra cost?
For homeowners prioritizing maximum energy efficiency, air sealing, and moisture control, closed-cell spray foam delivers performance that no other insulation type can match. It seals air leaks while insulating, reducing the need for separate air-sealing work. The higher upfront investment is often offset by greater energy savings and improved comfort.
What R-value should my walls have?
The minimum depends on your climate zone. In climate zone 4 (which covers parts of North Carolina), code requires R-13 cavity insulation plus R-5 continuous insulation for new wood-framed walls. For best performance, exceeding code minimums is recommended. Check the IECC requirements for your specific zone.
Sources
- Wikipedia: Building Insulation – Comprehensive reference on building insulation types, history, and significance, including climate zone requirements and ASHRAE standards
- Wikipedia: R-value (Insulation) – Detailed technical reference on thermal resistance measurement, R-value per inch for all major insulation materials, and the relationship between R-value and U-factor
- U.S. Energy Information Administration: Energy Use in Homes – Government data on residential energy consumption patterns, including the statistic that 52% of household energy goes to space heating and cooling
- International Energy Conservation Code (IECC) – The standard for defining climate zones and insulation requirements in the United States.
- ASHRAE 90.1 – The standard setting prescriptive minimum R-values for wall insulation.

- How Should Raleigh, NC Property Owners Evaluate Insulation for Long-Term Use? - September 23, 2026
- What Factors Affect Insulation Performance Across Different Parts of a Property? - September 23, 2026
- Could Spray Foam Insulation Be Useful Around Uneven Building Sections in Wake Forest, NC? - September 18, 2026